
BACKGROUND:
The Hubble Space Telescope was launch way back in 1990. When it first went up it was over budget and way late. Not a good start.
To make matters *MUCH* worse, it didn't work. An error in polishing the mirror led to, well, really poor quality images.
Fortunately NASA was able to send up astronauts to repair the STS and it started producing incredible images (YAY!) because it was above the Earth's atmosphere.
ASTRO IMAGES:
Astronomers take images in black and white/grayscale. Which seems odd. But right in line with our unit in light and filters and such, we now see that it makes very good sense for HOW they do that:
Astronomers place a RED filter in front of the B/W camera which allows ONLY the red photons through and they take an image of the object
Astronomers place a BLUE filter in front of the B/W camera which allows ONLY the blue photons through and they take an image of the object
Astronomers place a GREEN filter in front of the B/W camera which allows ONLY the green photons through and they take an image of the object
Then they import those images into the software PHOTOSHOP and colorize them there according to the exact, specific wavelength of light that corresponds to the filters they used
Then they *painstakingly* work to bring out the features of that object by adjusting brightness, contrast, hue and other features (which can take weeks or even months!)
Through contacts I made working at the Mauna Kea Observatory years ago I was able to contact a lead photo analyst at NASA and he provided me with a bunch of original Hubble Data... YAY!
We'll pretend we are NASA Photo Analysts and we'll work to combine our artistic and scientific selves to create VERY COOL color pictures from that data
SOFTWARE:
Photoshop or some other software that allows you to do LAYERING
PIXLR.COM is free and is very photoshop-like, although MUCH easier to learn
I've talked a bit about how NASA does photo-imaging.... it's really pretty cool.
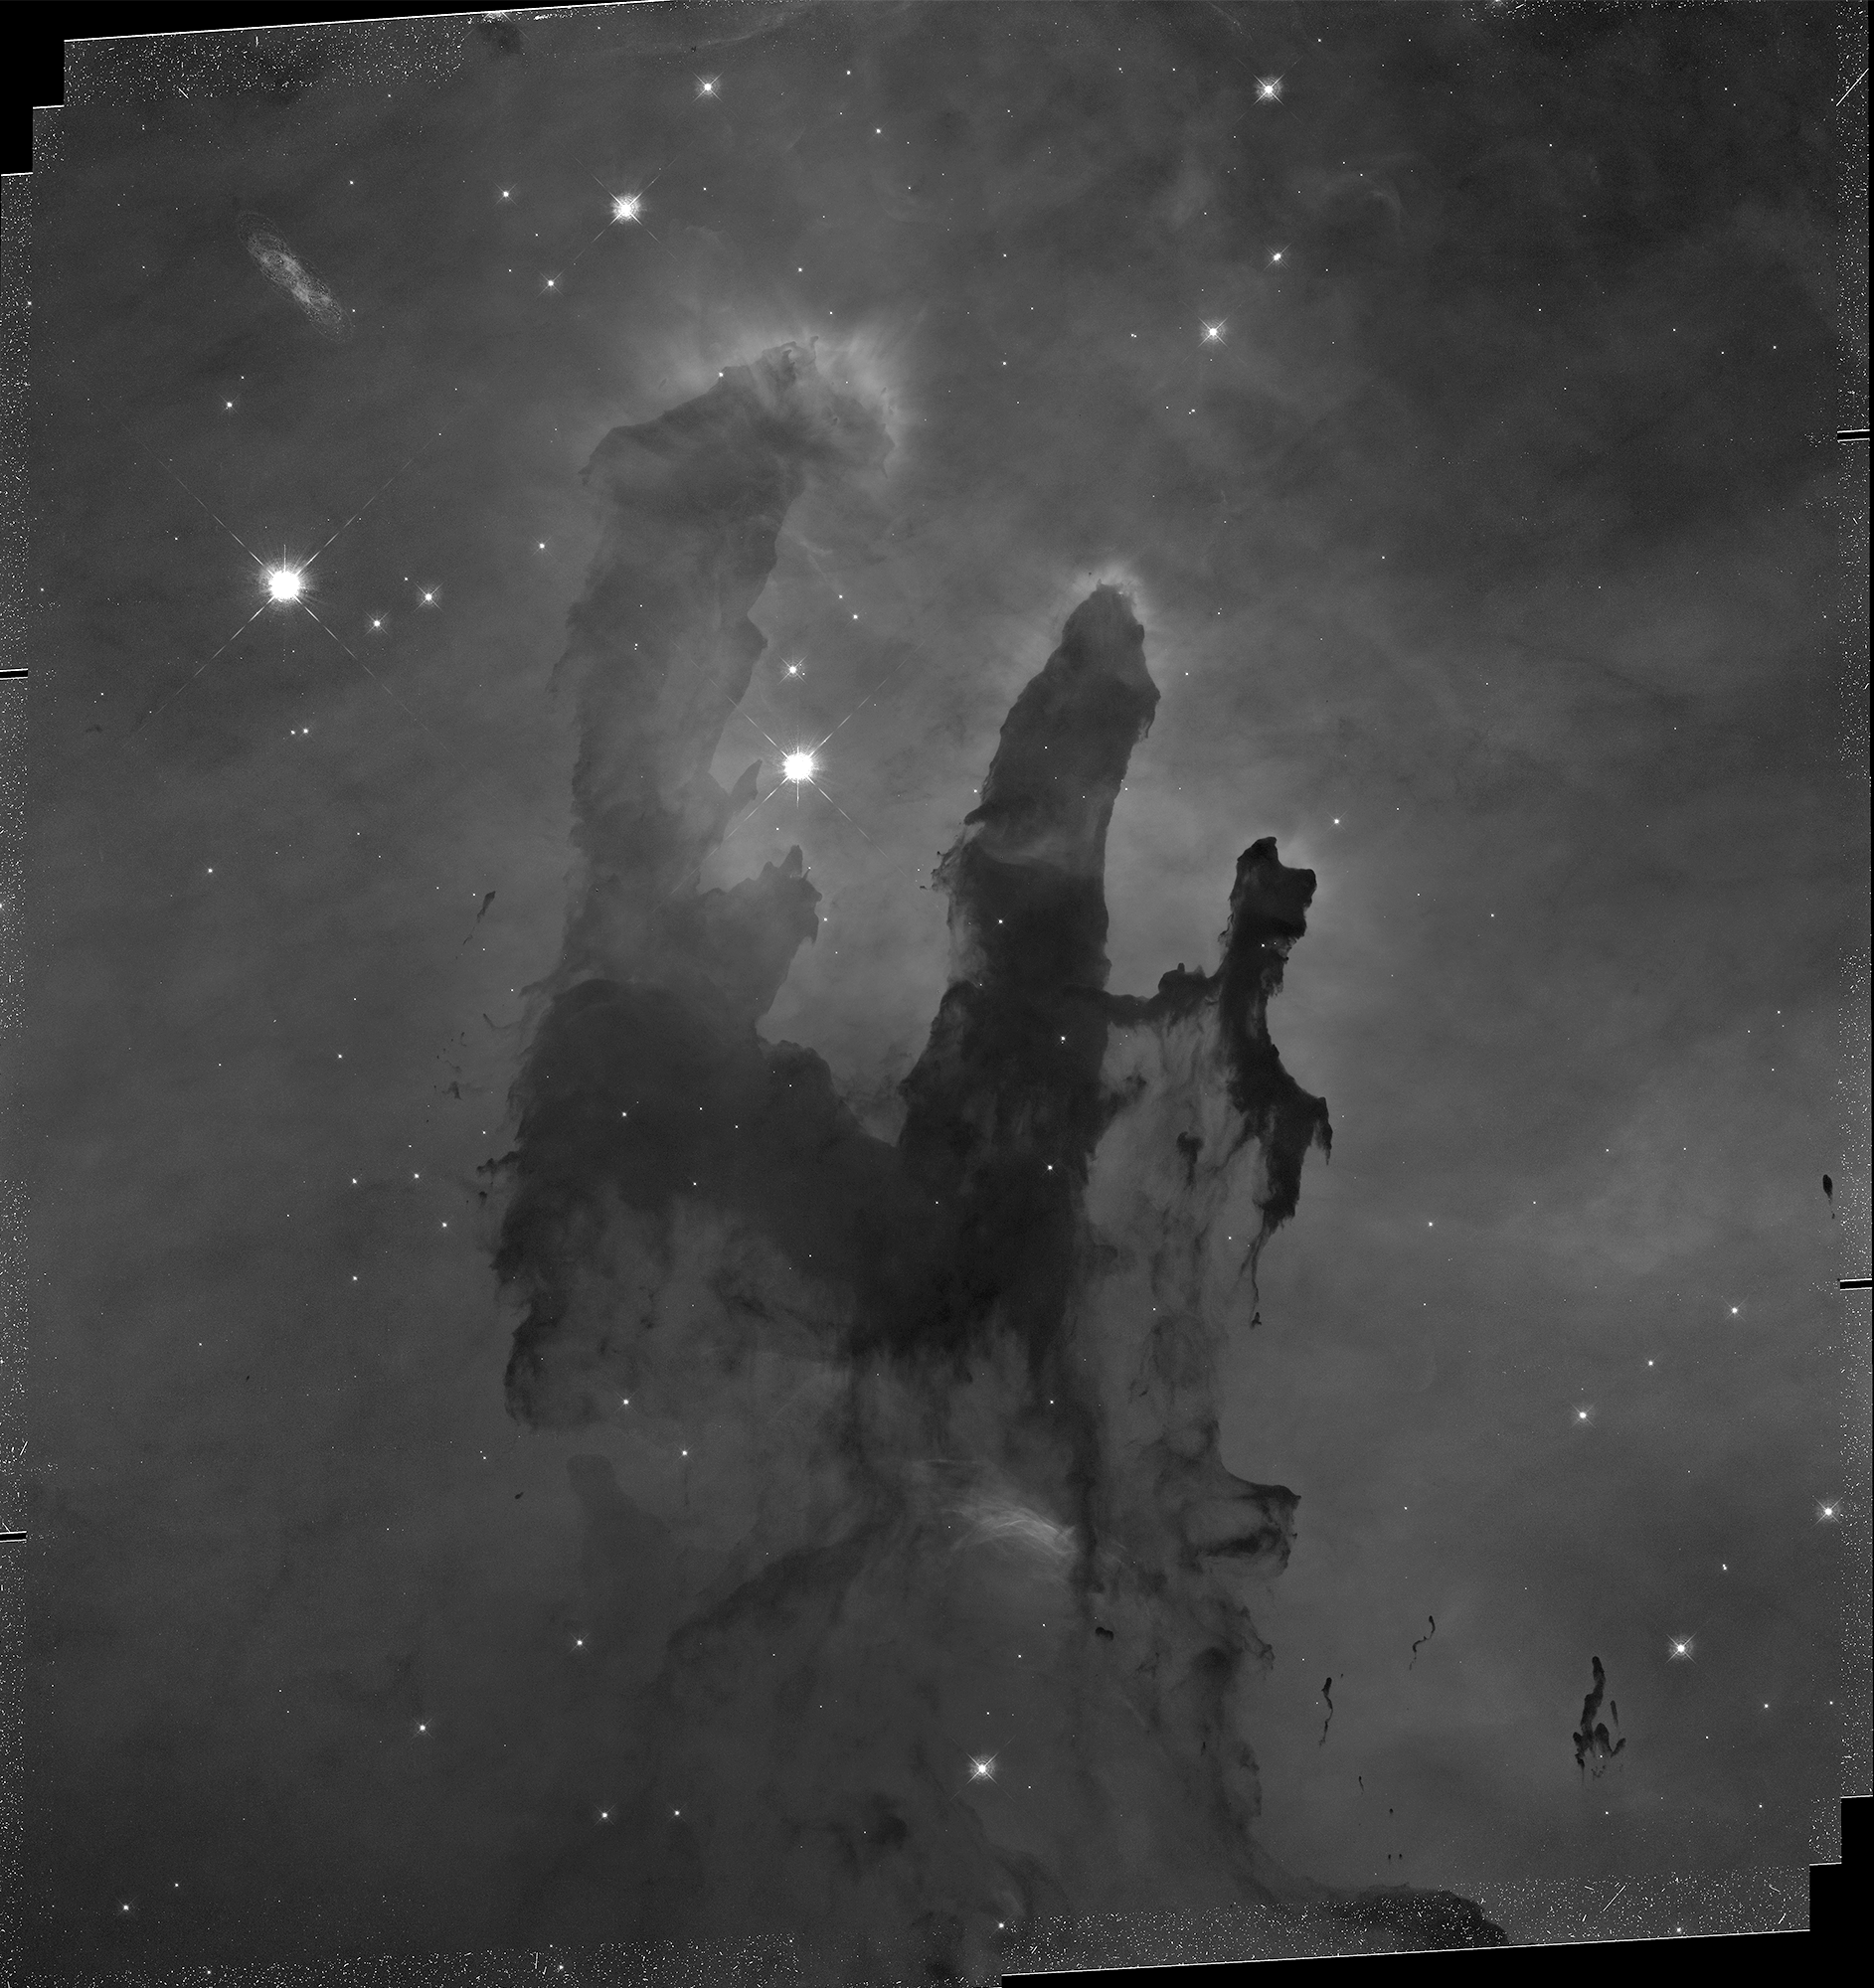
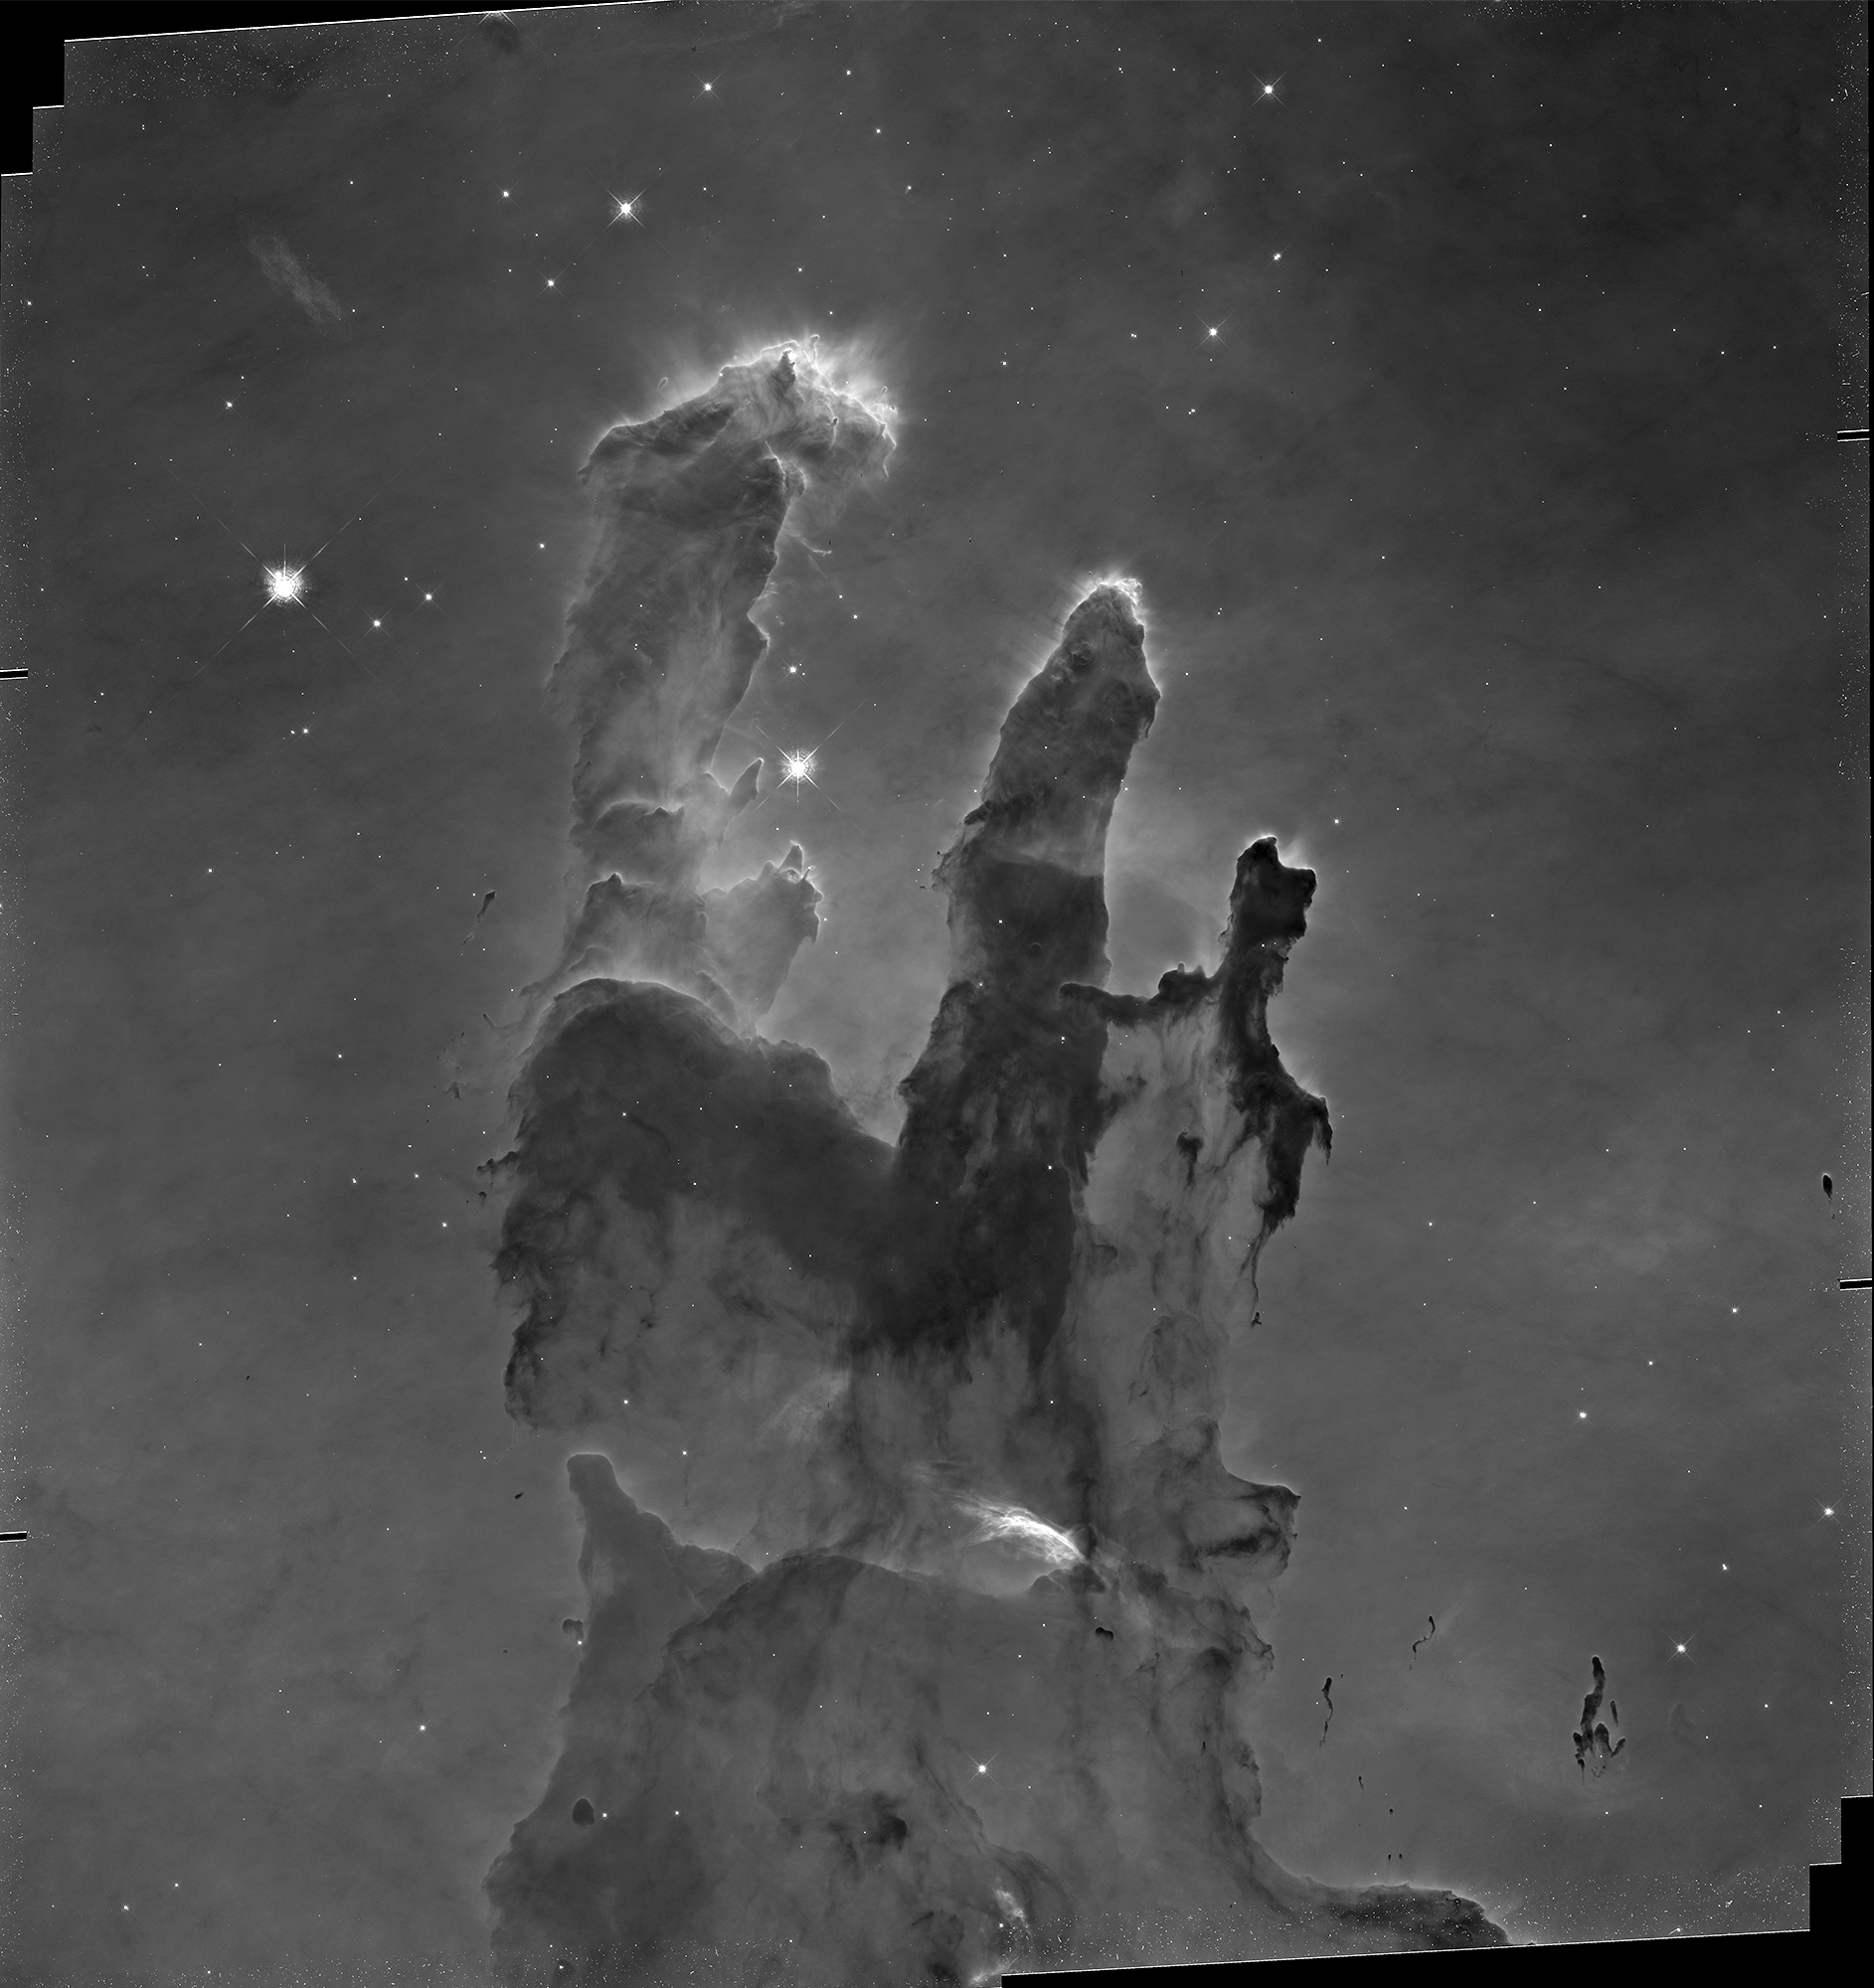
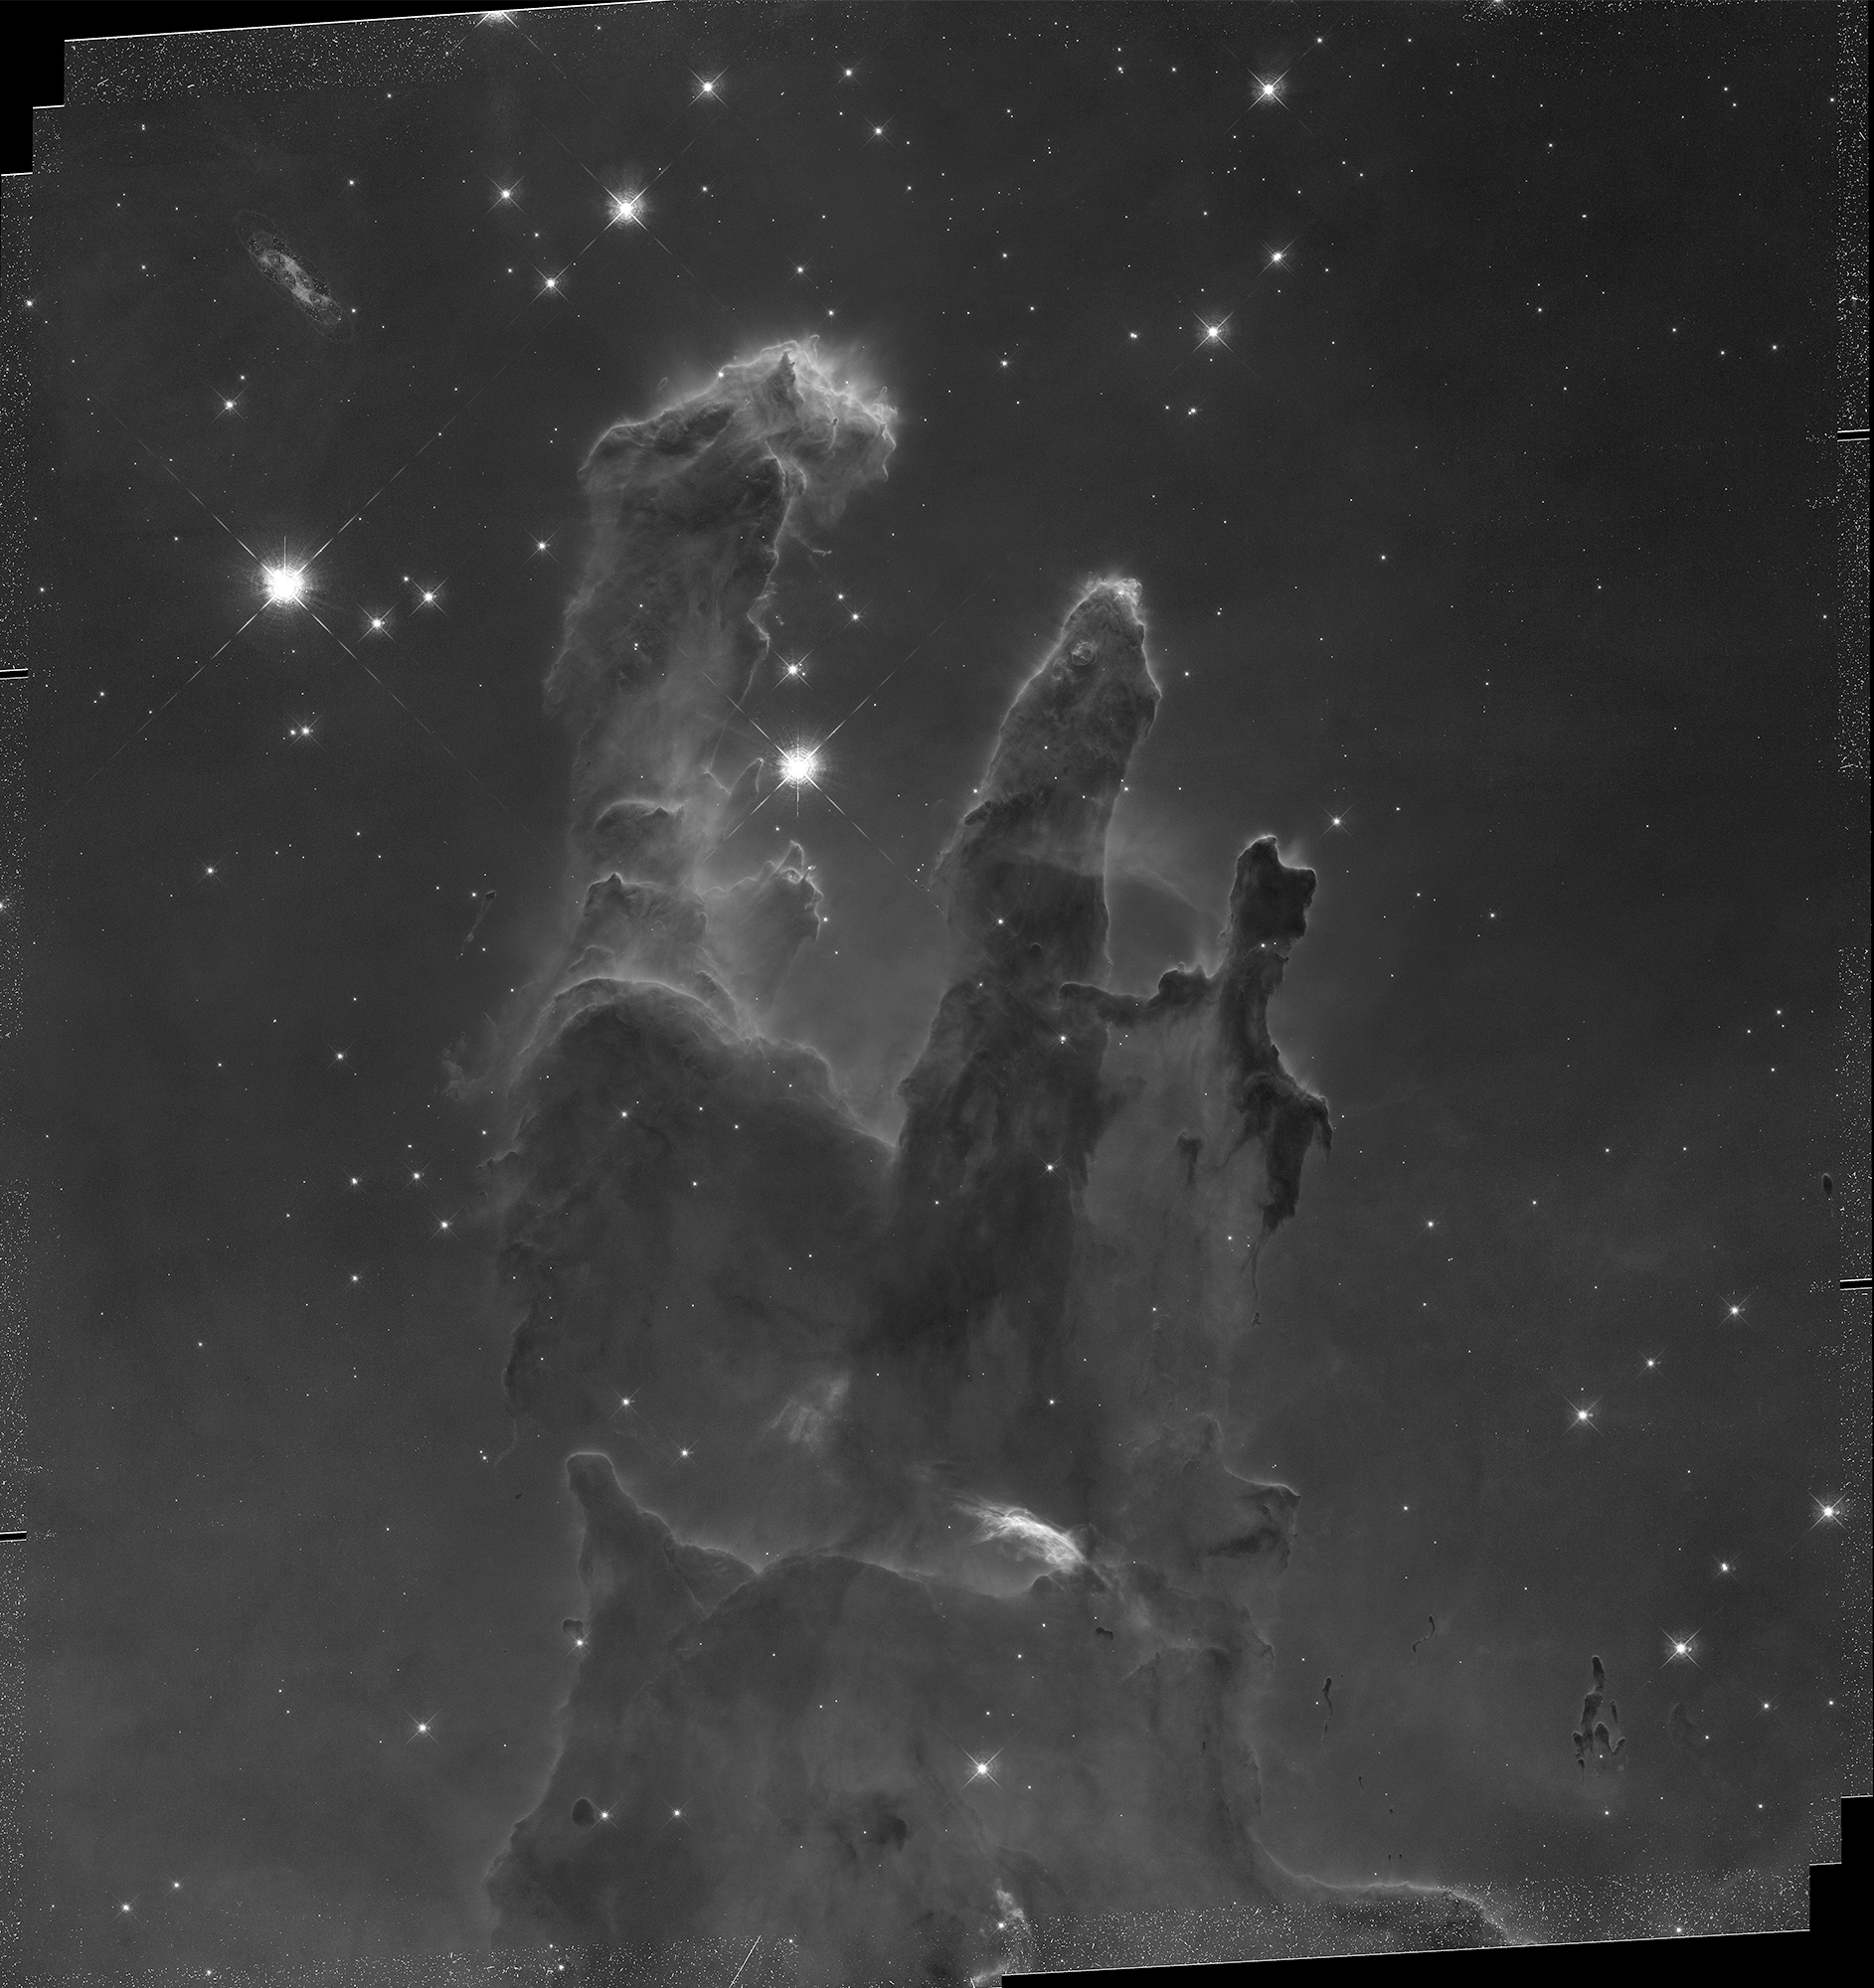
Now let's talk in a bit more detail of just how those photo analysis do such incredible work by taking a look at one of the most iconic pictures of all time: The Pillars of Creation
═══════════════════════════
Students frequently ask "...but what is the REAL color" of that object.
In a very real sense, the REAL color is in the eye of the beholder. When we look at the Orion Nebula through the eye piece of a telescope, we see a kind of puke-green washed out image.... not so impression.
But when we take several images in several wavelengths, layer them we get pretty phenomenal pictures like THIS
WHY?
═══════════════════════════
*Normally* we take several days (or more!) to do this project. We are a bit hurried this year so we'll cut a bunch out and do our best to K.I.S.S.
To wit:
1) Go to Pixlr (choose the *advanced* option) and open an account if you don't have one already (if you already have photoshop or some other photo-editing program that you are comfy with you are welcome to use that. Please note the program MUST be able to do layers)
2) Choose your object HERE
3) Sign up for your image HERE (1 per class ONLY please)
4) I have a screen castify on how to do layers HERE
5) Submit your work HERE