How To Get To Amazon Educate Sites
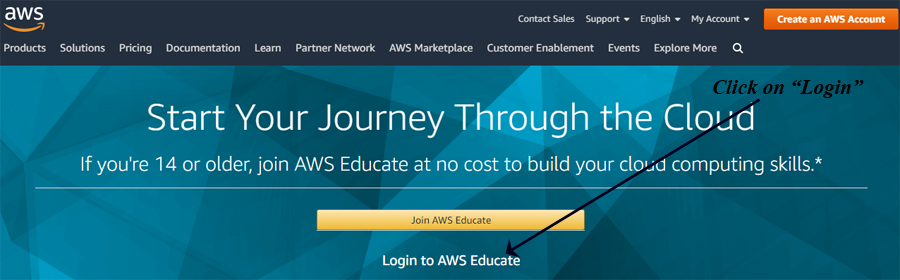
1) Go to the Main Amazon Educate Site HERE To skip the intro steps and review how to setup your S3 "Buckets" Click Here (you can always follow the steps below too!) |
2) Logon using the username & password you received from AWS-Educate when you answered their email (the password is NOT your regular district password)
|
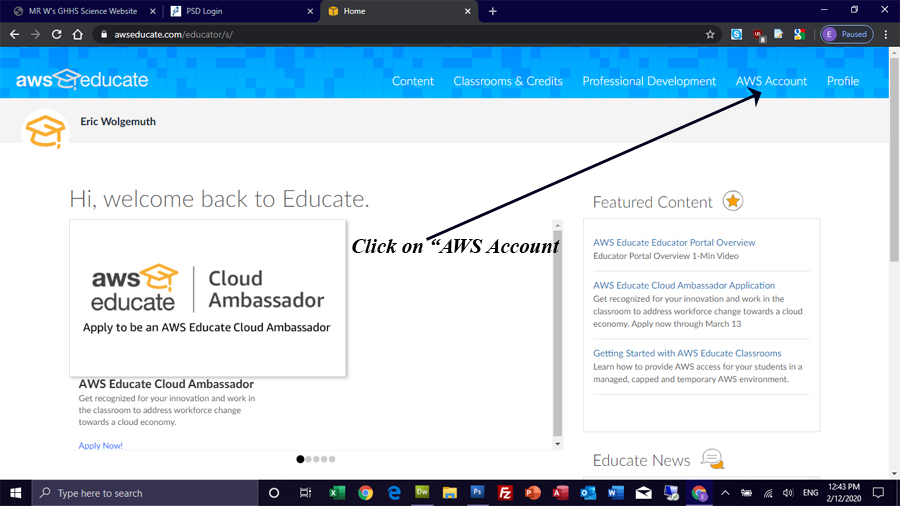
3) Click on AWS Account in the upper right:
|
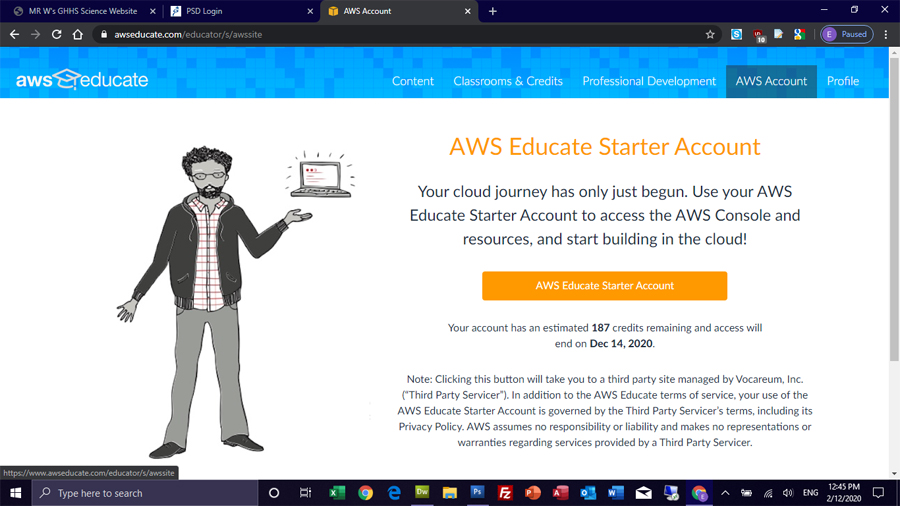
4) Click on AWS Educate Account. Note: You MUST ALWAYS come in to AWS through the AWS Educate Starter Account. Coming in through just regular ol' AWS won't work!
You should have $75 in credits to start. |
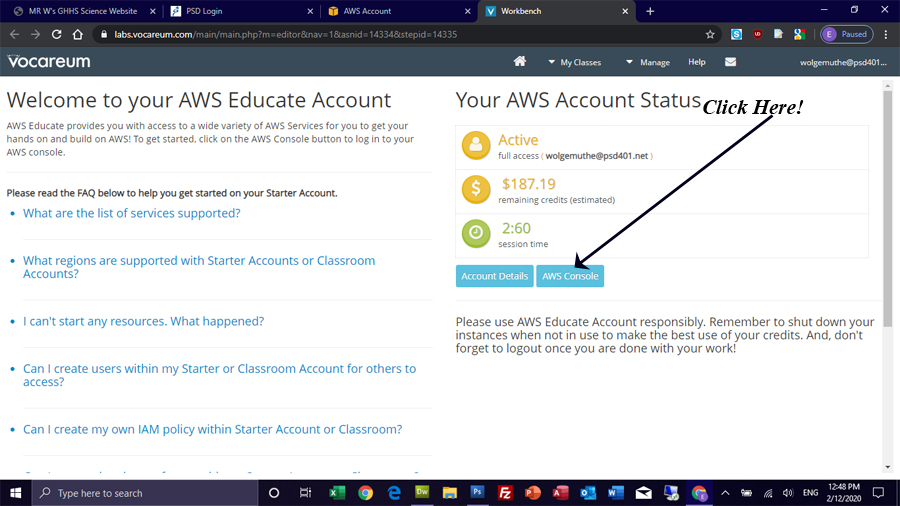
5) Click On AWS Console: Don't worry, most of what we do won't use any credits at all.... so $75 should be MORE than plenty (My teacher account is shown below, I have $200 to start!) If you're starting to "spend down" your account quickly, please let me know ASAP
|
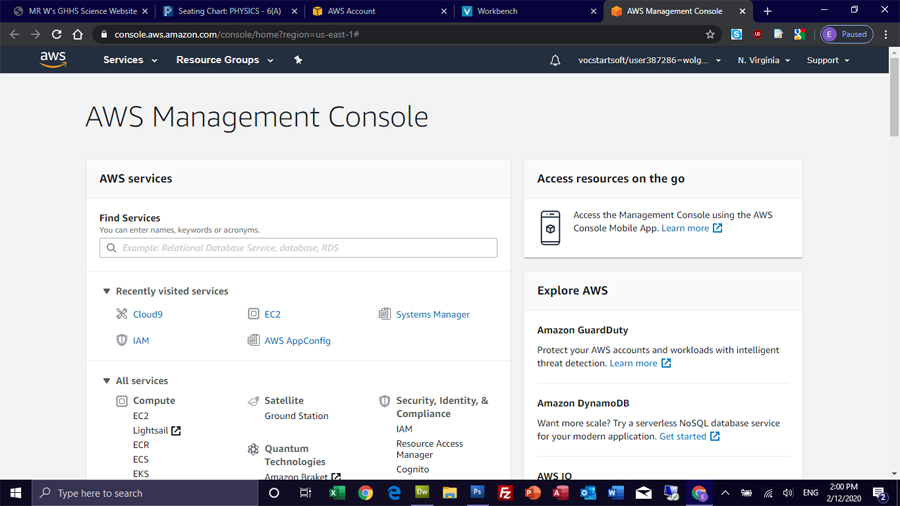
Welcome to the AWS Console: This is your home base for almost all things AWS!
|
|
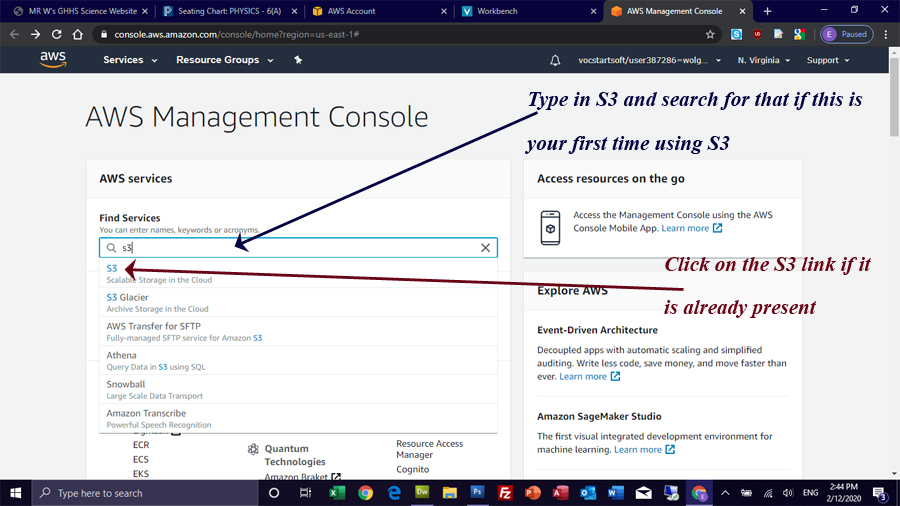
Notice that the console shows "Recently Visited" sites. If this is your first time working with S3, type in "S3" in the search window:
|
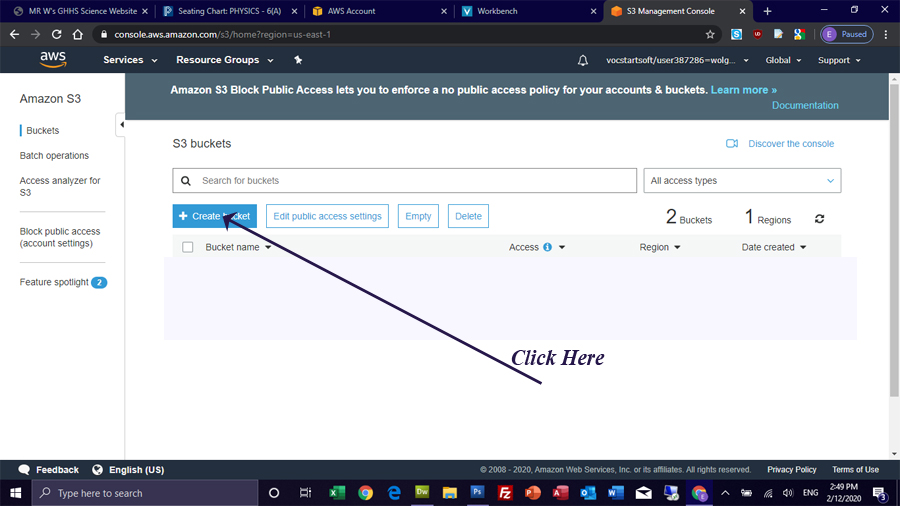
2) Let's Create a New "Bucket"
|
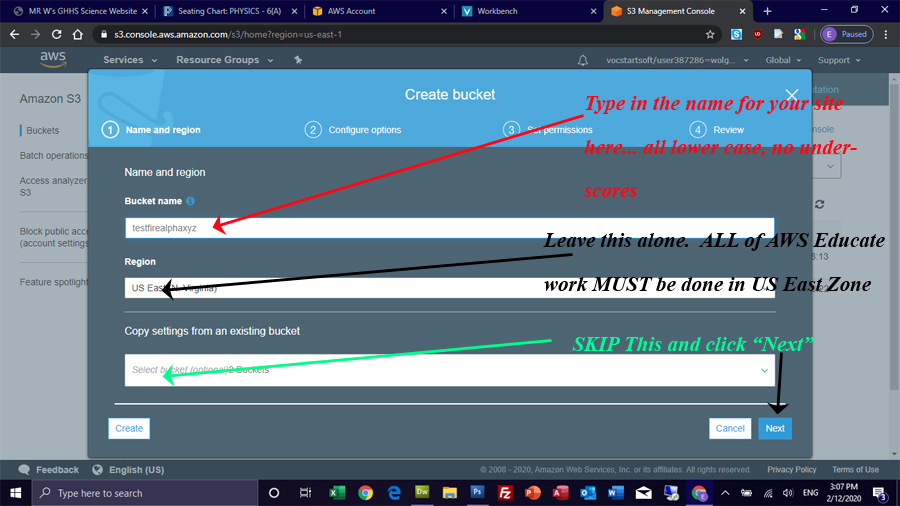
3) Now we need to give a unique name:
|
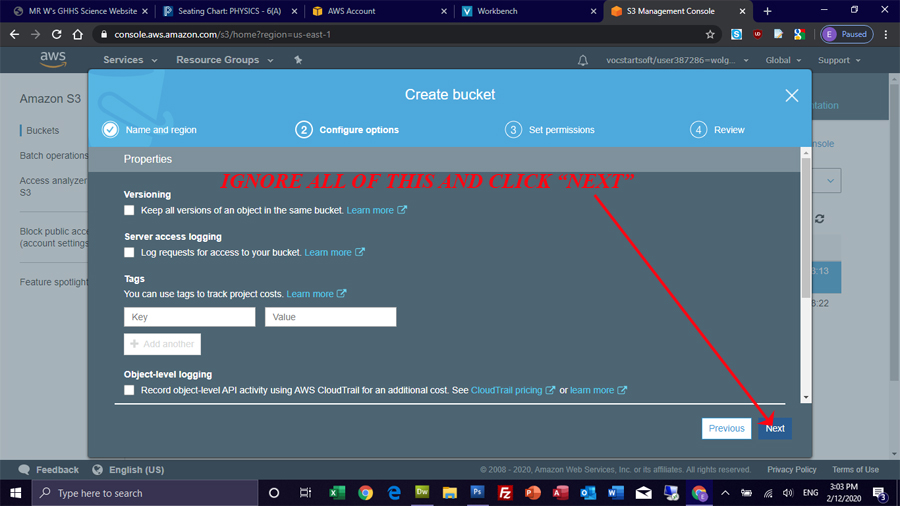
4) Moving on:
|
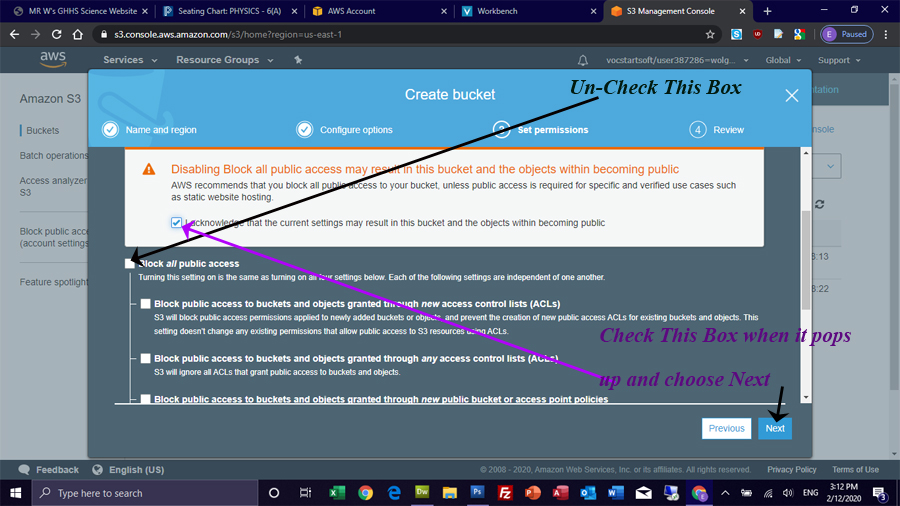
5) Make your site public:
|
6) Review and Select Save |
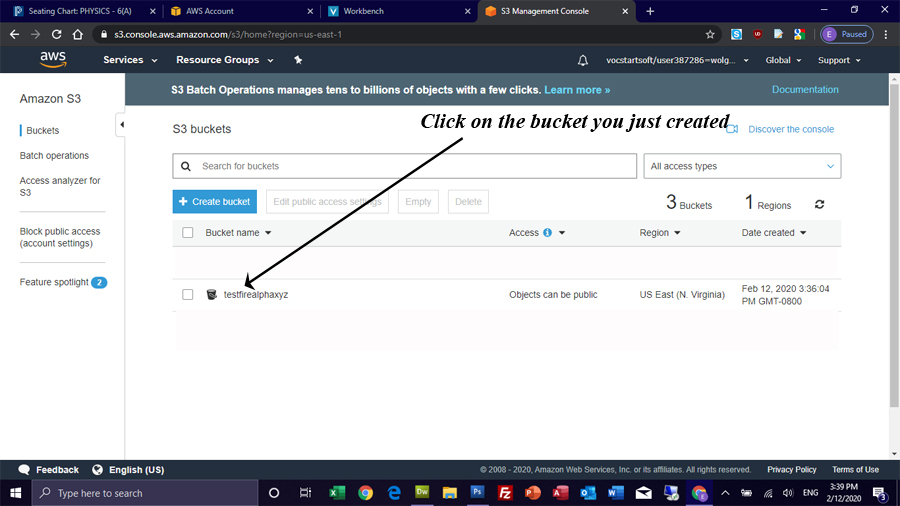
7) Now click on the S3 Bucket you just created:
|
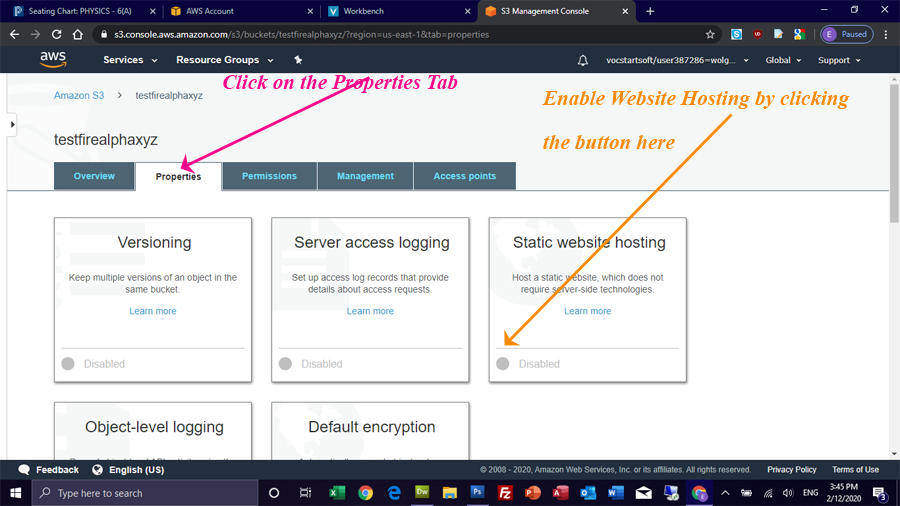
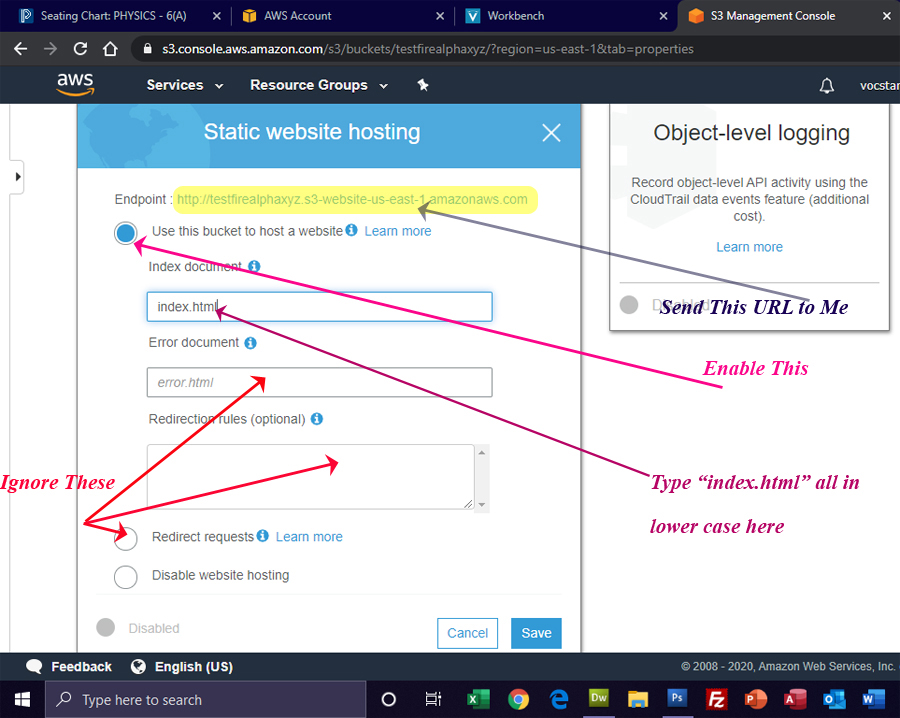
8) Now we need to make sure we can host a website:
That shows an additional box shown below:
Make Changes as Indicated and Hit Save |
| Uploading Files and Making Folders -- |